


The smallest details make the biggest difference in spectacular hotel/resort photography. Before each photo shoot, I meet with the management team and we visit each space and inspect for areas that may need improvement. This is a complimentary service I provide to all my clients because it allows us to be more efficient and create better images. You look good, I look good!
In my experience, if a potential guest sees a few blemishes, it undermines their confidence that the property is clean and well-maintained. They may or may not consciously identify what is “not right” but negatives are registered in their minds. Typically, the potential guest will compare images from hotel comps in the same general area. The hotel with the most perfect images usually wins out the majority of the time. My goal is to eliminate objections or concerns and assure your images are better than other comps..
Also, the hotel staff and sales team will be looking at these images for years; after a while, they’ll begin to focus on all the negatives of an image; thus undermining their confidence in their product. Perhaps the tips below seem elementary and common knowledge; however, in prepping for a photo shoot, there are so many things to address that sometimes the little details go unnoticed.
Most brands have specific guidelines for meeting room photography. Take a look at the brand requirements and plan accordingly. Regardless, here are a few useful and easy remedies for flawless hotel public spaces photography.
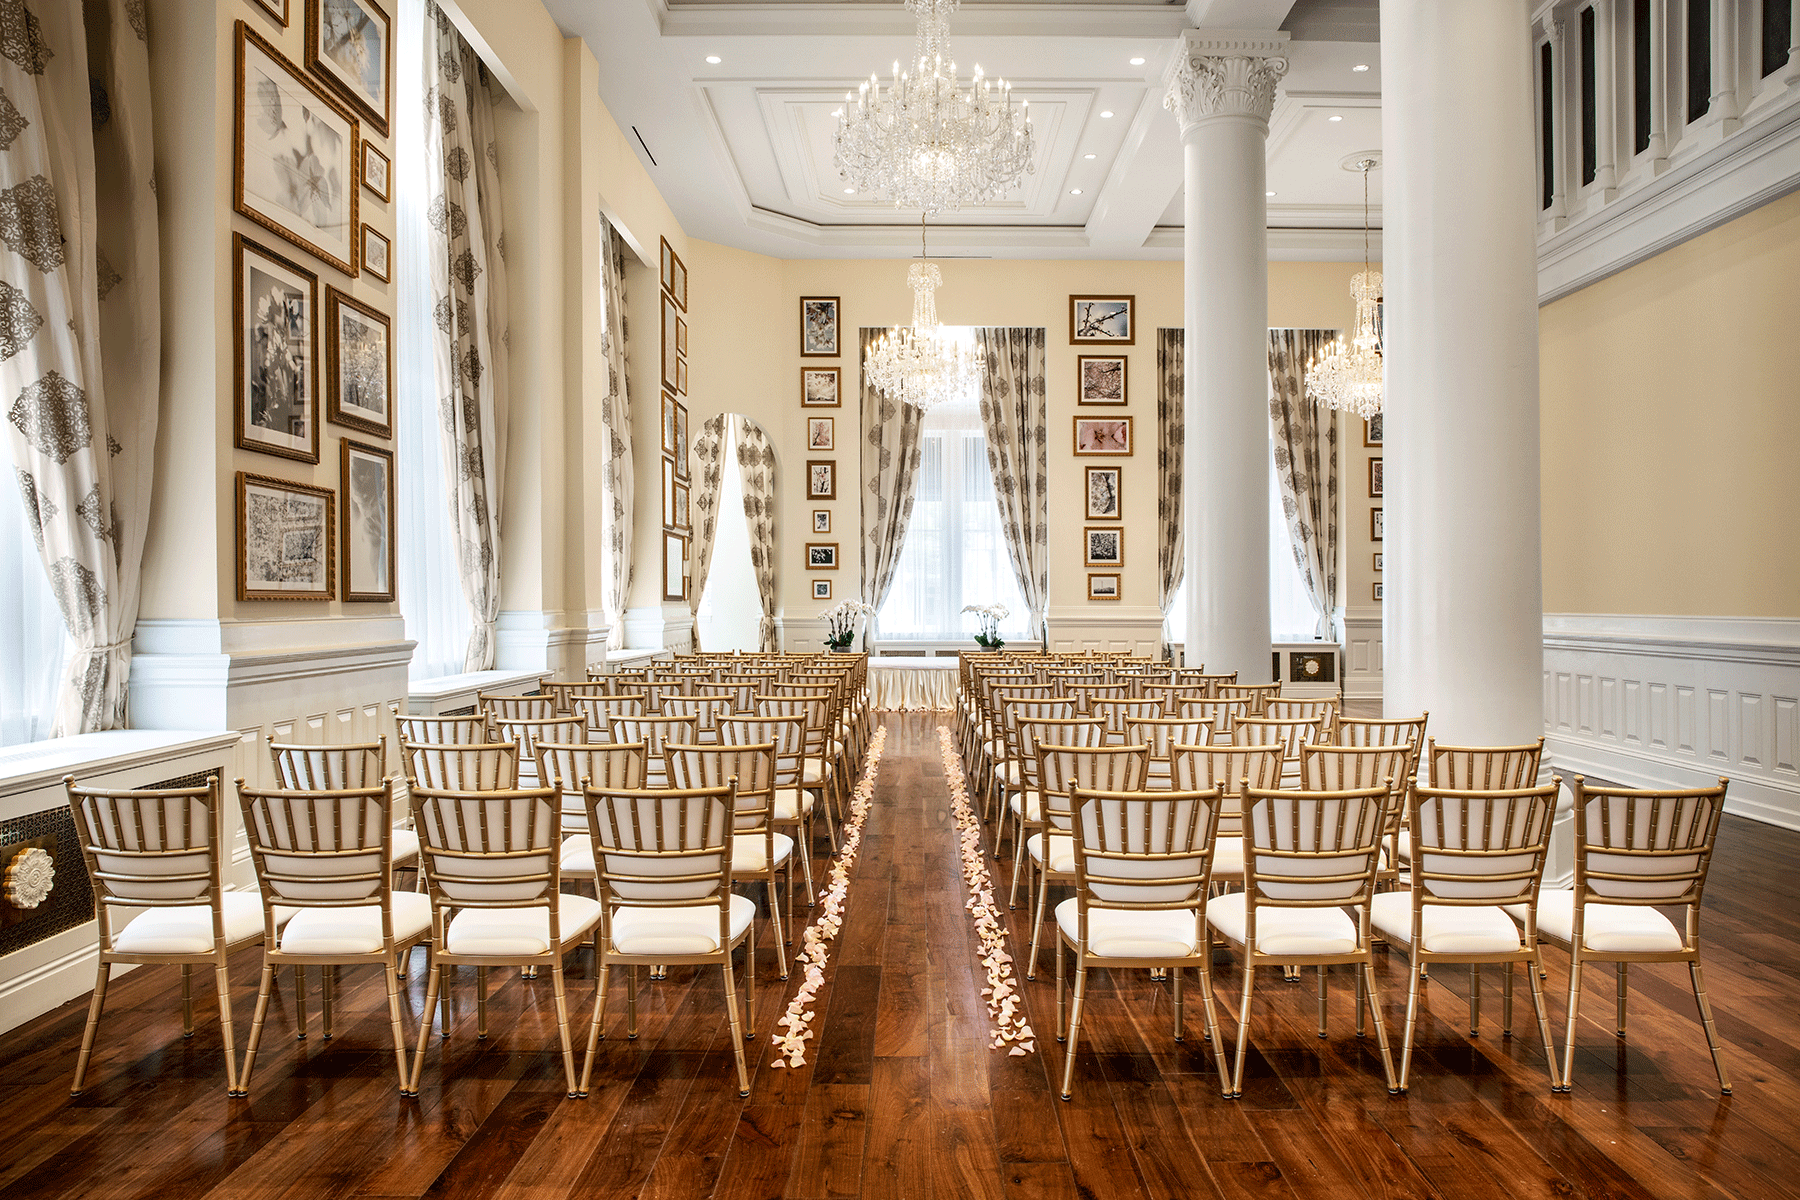
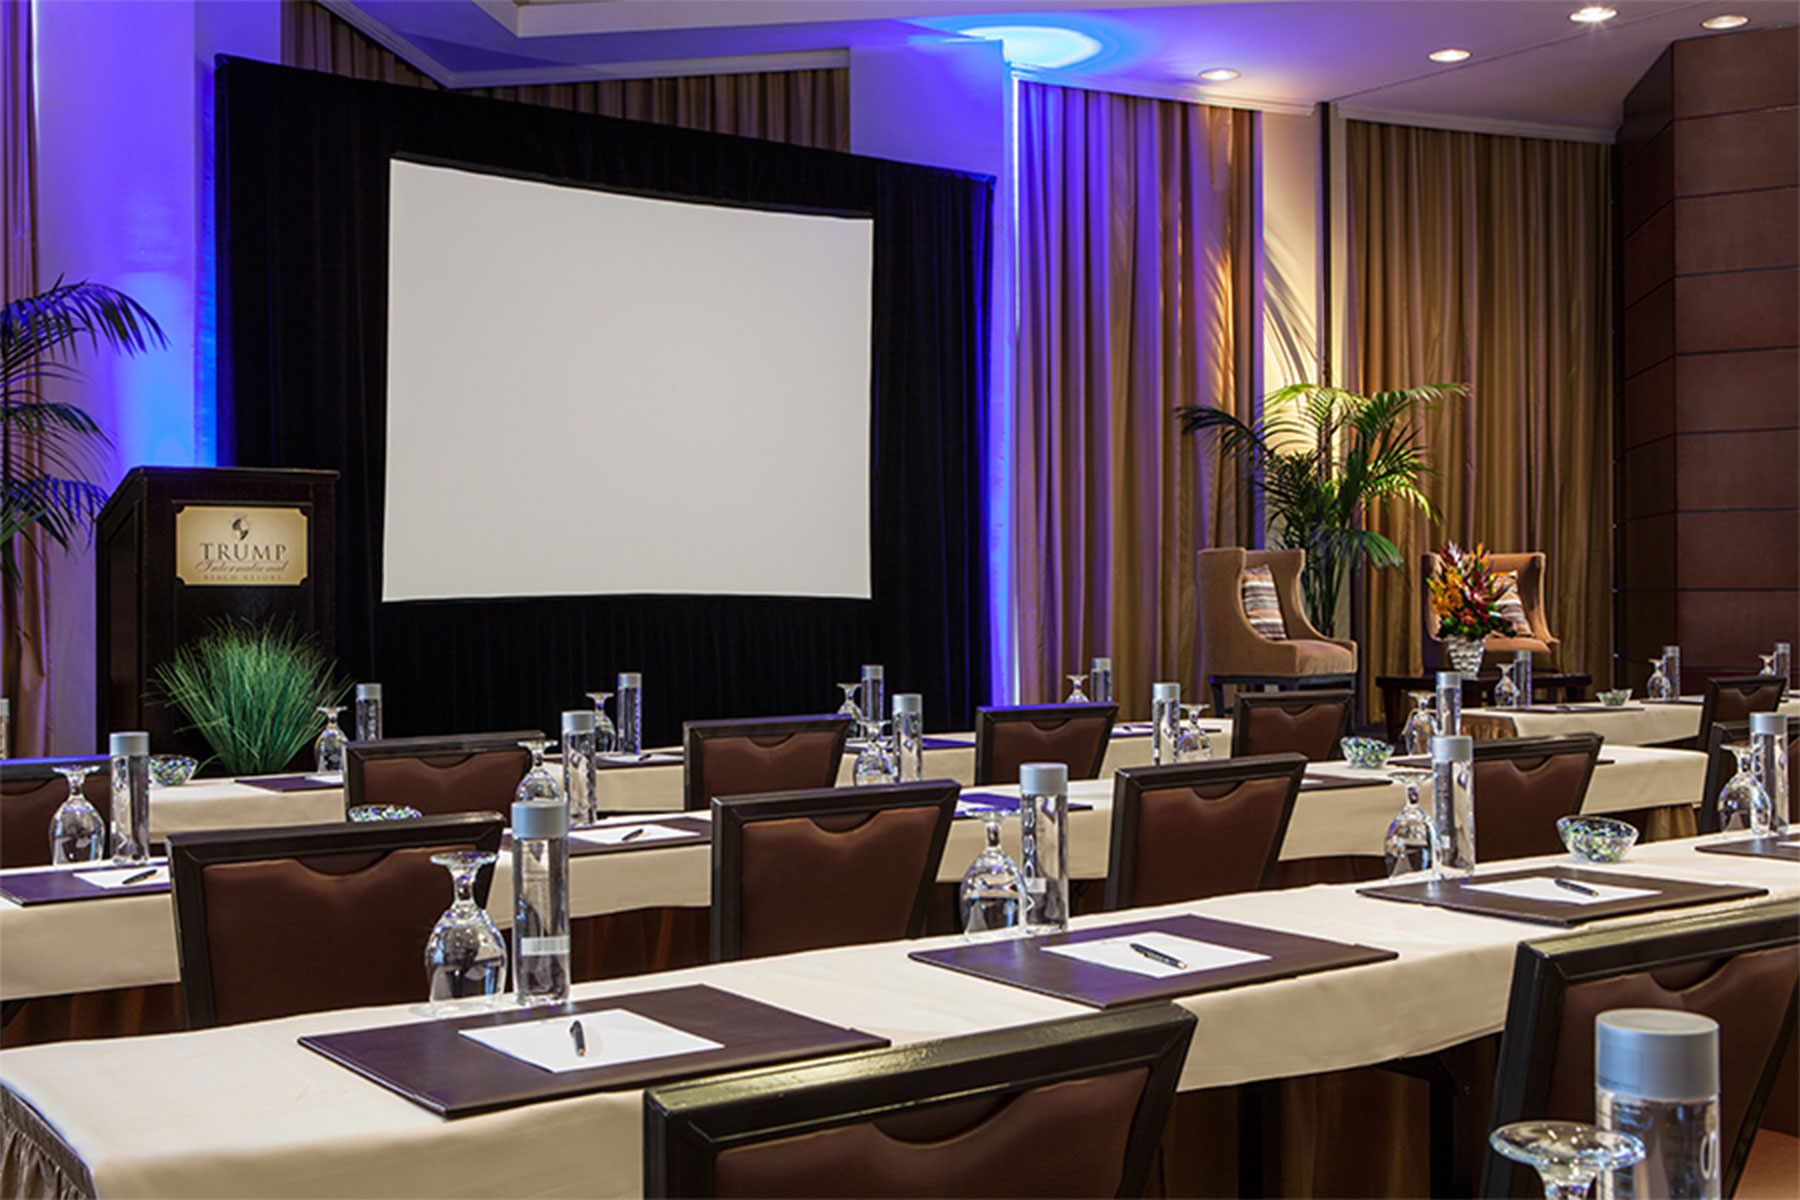
Table Cloths: Table cloths can make a spectacular shot less appealing if the table cloths are not uniform. Make sure all table cloths on all the tables are equal height from the floor. Either they all touch the floor – without creating a pile – or none do. For classroom style, the table linens should fall no lower than the seat of the chair. Again, each table’s linens should be uniform and match all tables in the room – including the table edges.
Linen Wrinkles: Wrinkles can undermine the beauty and appeal of any space. All linens should be pressed or ironed and left unfolded before applying to tables. After placing linens on tables, use seamstress pins to pull wrinkles and pin from behind.
Chairs and seating.: Chairs should not break the fall of the table cloths. Do not push chairs under the tables. It is often better to set an 8-round table for 6 people. It reduces the clutter and thus reduces clutter in the minds of the planner. For reception, theatre style or classroom, perfection is critical. Each chair should be precise in both row and column and similarly placed at each table for reception rounds. It can make or break a photo!
Table Tops: The table top varies depending on the usage of the space. For crescent rounds, typically a maximum of 5 chairs per table. For receptions, unless it is an over-the-top reception, less is more. It is unnecessary to have more than 4 pieces of silverware and 1 (max 2) glasses per setting. Sometimes a charger and plate are too much; select just one , not both. Set an 8-top for 6 people to give it air and breathing room.
Centerpieces: table centerpieces can really make a reception photo spectacular. Consider using a florist or set designer for your reception shots. Remember, the photo will be used for years and the expense of original and beautiful arrangements will end up costing very little over time. For applications other than a reception, I suggest not using table arrangements. Tastes change over time and what is in style now becomes obsolete in a year or two. Think about green apples! Once the rage, now overdone and out of style. If you do use centerpieces, make them small and blend them into the space. Succulent arrangements in a planter are more generic. Each brand may have recommendations. Familiarize yourself with the brand’s “do’s & dont’s”.
Plants: Plants in the corners of a room or on either side of a dais can soften the angles and loneliness of a single table and two chairs in the front of a room. Perhaps a small plant on either side of the table or a row of small potted plants in front of the table to make it more inviting and less “teacher/pupil” style.
A/V Equipment: Refer to the brand’s standards for what’s acceptable. It seems drop-down projector screens are obsolete and large TV’s or A/V equipment that is skirted, piped & draped are more common.
Logos: Logos can easily be added to a TV or screen. Check the brand standards for th inclusion/exclusion and size of logos. logos can be added in post-production. A hi-res JPG image is suggested.
Lighting: Lighting can make or break a meeting space shot. If you have windows, it is often a good idea to express it ion the photo; however, curtain sheers should be closed. Also, just because you have lots of lights, it doesn’t mean they all have to be on when the shot is taken. Florescent lighting may be good for some situation but not many!
Water: many properties are eliminating bottles of water and replacing with the pitchers of water in an effort to go “green”. If so, make sure the pitchers are clear, have ice and preferably some fruit in the pitcher to bring it to life. Each place setting should also have glasses if using pitchers
As more and more properties are going “green”, there are positives and negatives. While a table without linens may look stark and industrial, there’s a value to it. NO WRINKLES! Removing wrinkles in meeting shots is a full-time job! I believe there’s a time and place for linen-less tables but a wedding reception shot is not one of them. Be selective and think about the bigger picture in regards to using or not using linens. Note pads and pencils are going by the wayside and are often available for taking but not at each place setting. For a quality photo, there needs to be something to designate a space and activity, otherwise, there’s a room full of empty chairs and blank tables.
I’ve only listed a few of the many factors that should be considered when shooting meeting room spaces. Each property and brand is unique and may have specific photography standards. As a preferred Hyatt and Hilton brands photographer, I always abide by each brands’ standards. The list above is simply a thought starter and may or may not be applicable to your photography plans.